
Table of Contents
- Start with One Large Print Per Zone
- Poster Sizing and Dimensions for Small Spaces
- Hanging Height and Eye Level Placement
- Damage-Free Wall Hanging Methods for Renters
- Small Apartment Gallery Wall Layout Essentials
- Poster Framing Ideas for Small Spaces
- Composition and Visual Balance in Compact Rooms
- Frequently Asked Questions
Last Updated: September 19, 2026
How to arrange posters in small apartments requires strategic placement that makes your space feel intentional, not cramped. This guide covers practical techniques for maximizing your walls without overwhelming the room.
Start with One Large Print Per Zone
The biggest mistake is hanging too many pieces at once. Begin with a single large print in each distinct area, bedroom, living room, entryway, kitchen. Pick one wall per zone and place one substantial print there. This creates visual focal points without cluttering and gives your eye somewhere to rest.
According to design principles for 2026 from Warmcazza, prioritizing visual breathing room over wall coverage is the primary trend for small living areas. Open space actually makes rooms feel larger than filling every wall.
Start by selecting a print that speaks to you. Let it sit for a few days. Notice how it changes the room’s feel. Only after you’re confident in that first piece should you consider adding more.
Avoid the urge to fill empty wall space immediately. Small apartments benefit from restraint. One powerful image beats five mediocre ones every time.
Poster Sizing and Dimensions for Small Spaces
Poster size matters significantly in small spaces. Wrong dimensions can make a room feel off-balance or cramped.
Feature Wall Dimensions
Your main feature wall, the one that anchors a room, should display a print between 80-120 centimetres wide. This size commands attention without dominating the entire wall. It becomes a genuine focal point rather than just another decoration.
According to About Wall Art’s 2026 studio apartment guide, prints in this range maintain proper scale for small spaces and create the visual impact you’re after. A print this size works well above a bed, sofa, or entryway console.
Measure your wall before ordering. Account for furniture placement. The print should relate proportionally to what’s beneath it. A print above a bed should span roughly two-thirds of the bed’s width. When you find the perfect design, Products Made to Order ensures your poster is customized to your exact specifications and dimensions.
Narrow Wall Sizing
Secondary walls call for 40-60 centimetre prints. This size fits nicely in hallways, bathrooms, or narrow side walls without overwhelming the area. Use them for accent pieces that introduce secondary colors or complementary themes.
Feature walls need 80-120 cm prints. Narrow walls work best with 40-60 cm prints. This proportion creates balance in compact rooms.
Hanging Height and Eye Level Placement
Center the print at eye level, approximately 150-160 centimetres from the floor. Above a bed, hang slightly higher for viewing from a reclined position; above a sofa, adjust for seated eye level. Measure twice and use a level to ensure your print hangs straight.
Damage-Free Wall Hanging Methods for Renters
Renters need damage-free hanging methods to personalize their space without losing their security deposit. Different methods work better for different poster sizes and wall types.
Command Strips and Adhesive Hooks
Command strips are the most popular damage-free option. They come in various weight ratings: small (450g), medium (900g), and large (2.3kg). For most framed posters, medium strips suffice. Clean the wall with rubbing alcohol, press firmly for 30 seconds, and wait 24 hours before hanging. When removing, pull slowly and parallel to the wall. Command strips work on smooth drywall, textured surfaces, and painted brick, but not on wallpaper, glossy paint, or popcorn ceilings.
Damage-Free Picture Hanging Hooks
For heavier framed posters (over 2.3kg), adhesive hooks are more reliable than strips. These hooks typically hold 3-5kg and install the same way as strips: peel, press for 30 seconds, wait 24 hours. They leave a small circular mark on removal, less noticeable than a nail hole, though touch-up paint may be needed.
Tension Rods and Wire Systems
Tension rods and picture wire systems offer zero-wall-contact alternatives. Tension rods fit between floor and ceiling or between walls; wire systems use ceiling-mounted rails with adjustable wires. Both are completely reversible and work on any wall type, though they’re more visible and suit modern aesthetics.
Washi Tape and Painter’s Tape
Washi tape and painter’s tape work for lightweight posters under 450 grams. They’re ideal for testing layouts or frequent decor changes, but can leave residue if left on walls for more than a few months, especially in humid environments.
Never use nails, screws, or permanent adhesives in a rental. The landlord’s inspection will catch them, and you’ll pay for repairs. Adhesive solutions take five minutes to install and remove without consequence, use them instead.
Choosing the Right Method for Your Poster
Consider poster weight, wall type, and duration. Lightweight unframed posters on smooth drywall work with command strips; heavy framed prints on textured walls need adhesive hooks; gallery wall layouts can use washi tape. Keep a variety of strips and hooks on hand for flexibility.
Small Apartment Gallery Wall Layout Essentials
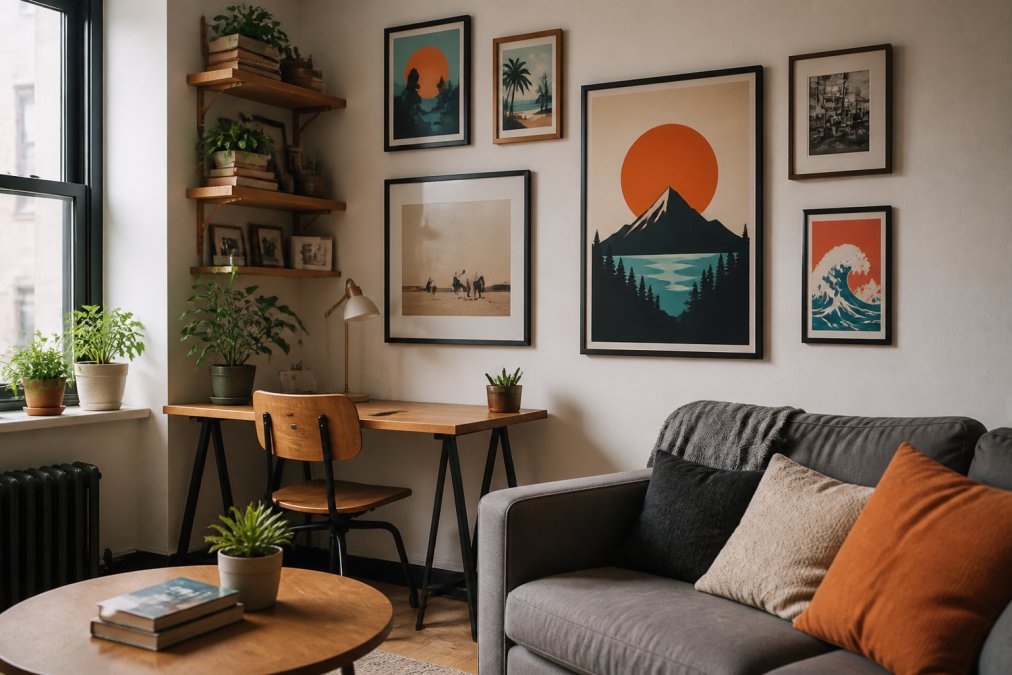
Gallery walls need restraint in small apartments. A sprawling wall overwhelms compact rooms. Instead, create a focused cluster of 3-5 pieces in a defined area for variety without visual chaos.

The Accent Gallery Wall Approach
Limit your gallery wall to a specific zone. Above a console table, beside a doorway, or in a corner works well. Keep the overall dimensions tight, roughly 90-120 centimetres wide and 100-130 centimetres tall.
Mix frame styles and mat colors, but keep a cohesive theme. All black frames with white matting creates unity. Or stick to natural wood tones throughout. Consistency prevents the wall from feeling chaotic.
Space your pieces thoughtfully. Leave 5-8 centimetres between frames. Equal spacing looks intentional. Random gaps feel accidental and diminish impact.
Using Templates for Precision Placement
Templates remove guesswork from gallery wall installation. Print out scaled versions of each frame on paper. Tape them to the wall in your desired arrangement. Live with it for a day. This preview catches mistakes before you make holes.
Many design sites offer free printable templates. Alternatively, trace your frames onto kraft paper. Cut out the shapes and arrange them on the wall with painter’s tape. Adjust until the layout feels right.
Once you’re satisfied, use the paper templates as guides for nail or hook placement. Mark hole locations with a pencil. Then remove the paper and install your hardware.
Poster Framing Ideas for Small Spaces
Framing transforms a poster from temporary decoration to permanent art. It also protects your print and elevates its presence in the room. But in small spaces, the right frame choice goes beyond aesthetics, it affects how your poster interacts with light and space.
Frame Styles for Compact Rooms
Simple frames work best in compact spaces. Avoid ornate designs that compete for visual attention. A clean black, white, or natural wood frame complements most interiors without adding visual weight. Thin frames (under 2 centimetres wide) feel less intrusive than chunky borders, which is especially important when wall space is limited.
Matting deserves equal attention. A mat creates breathing room between your poster and the frame edge. It makes the print feel more intentional and professional. White or cream matting works universally and reflects light, making the poster feel more prominent. Colored matting can tie the poster to your room’s palette, but test the color in your actual lighting before committing.
Consider frameless options for an ultra-modern look. Frameless prints with magnetic or adhesive backing mount flush to the wall. They take up minimal visual space and suit minimalist aesthetics perfectly. The trade-off is that they offer no protection for the print itself, so they work best in low-traffic areas like bedrooms.
Lighting: The Hidden Factor in Frame Selection
Most people overlook how lighting affects framed posters in small apartments. Poor lighting makes even beautiful artwork disappear into the wall. Strategic lighting makes posters pop without overwhelming a compact room.
Natural light is ideal but unpredictable. If your poster hangs near a window, it will look vibrant during the day and fade into shadow at night. If it’s far from windows, it needs supplemental lighting to be visible.
Accent lighting is the solution.
Budget-Friendly Framing Without Compromise
Custom framing is expensive, but several affordable alternatives exist. Big-box retailers offer pre-made frames in standard sizes (20×25 cm, 30×40 cm, 40×50 cm) at a fraction of custom prices. If your poster matches one of these sizes, you’re done.
Frame choice affects both aesthetics and function in small spaces. Thin, simple frames keep visual weight low. Matting adds intentionality. Accent lighting makes posters visible and prominent without overwhelming the room. Budget-friendly options like pre-made frames and DIY kits deliver professional results at a fraction of custom prices.
Composition and Visual Balance in Compact Rooms
Visual balance in small apartments determines whether your space feels calm or chaotic. Balance doesn’t mean symmetry, it means distributing visual weight thoughtfully.
Frequently Asked Questions
How do you hang posters in an apartment without damaging walls?
Command strips and adhesive hooks are the safest methods for renters. They hold posters securely without leaving marks when removed properly. For heavier framed prints, use damage-free picture hanging strips rated for the weight. Always test on a small area first, and remove strips slowly at a 45-degree angle to avoid paint damage. This approach lets you arrange posters in small apartments without landlord concerns.
What is the best layout for a small gallery wall?
Keep gallery walls compact and use them as accents, not dominant features. The 2026 design principle emphasizes one large print per zone rather than overwhelming the space. If creating a small apartment gallery wall layout, limit it to 3-5 pieces maximum, maintain consistent spacing (5-8 cm between frames), and choose a cohesive color palette. Start with one or two pieces to gauge the impact before adding more.
How high should posters be hung in a small room?
The center of your poster should align with eye level, approximately 152-157 cm from the floor. This creates visual comfort and draws attention naturally. For posters above furniture like beds or sofas, position the center 20-30 cm above the furniture top. In small spaces, proper hanging height helps create spatial awareness and prevents the room from feeling cluttered or off-balance.
Can you mix different poster sizes in a small apartment?
Yes, but with intention. Feature walls should use prints between 80-120 cm wide, while narrow walls work best with 40-60 cm prints. Mixing sizes works when they share a cohesive color scheme or theme. Avoid random size combinations that create visual chaos. The key is maintaining proportion and ensuring each piece serves a purpose in the room’s overall composition rather than adding clutter.
Leave a Reply